
Rock tumbling is a rewarding hobby that transforms rough stones into smooth, polished pieces. While the process is simple in concept, good results depend on patience, preparation, and using the right materials at each stage.
If you’re learning how to tumble rocks, this step-by-step guide will walk you through the entire process from start to finish while helping you avoid common mistakes that can slow progress or affect results.
What You Need Before You Start
Before you begin tumbling rocks, it’s important to understand what each tool and material does in the process. Rock tumbling works through gradual abrasion, and having the right setup helps to make sure you get consistent results while avoiding unnecessary wear on your equipment or stones.
Rock Tumbler

A rock tumbler is the machine that does the work of shaping and polishing your stones through repeated motion.
- Rotary tumblers are the most common choice for beginners. They slowly rotate rocks and grit together, making them ideal for smoothing rough edges and shaping stones evenly.
- Vibratory tumblers move rocks through vibration rather than rotation. They work faster but are generally better for refining and polishing stones that are already shaped.
For most beginners learning how to tumble rocks from scratch, a rotary tumbler is the most forgiving and versatile option.
Rough Rock
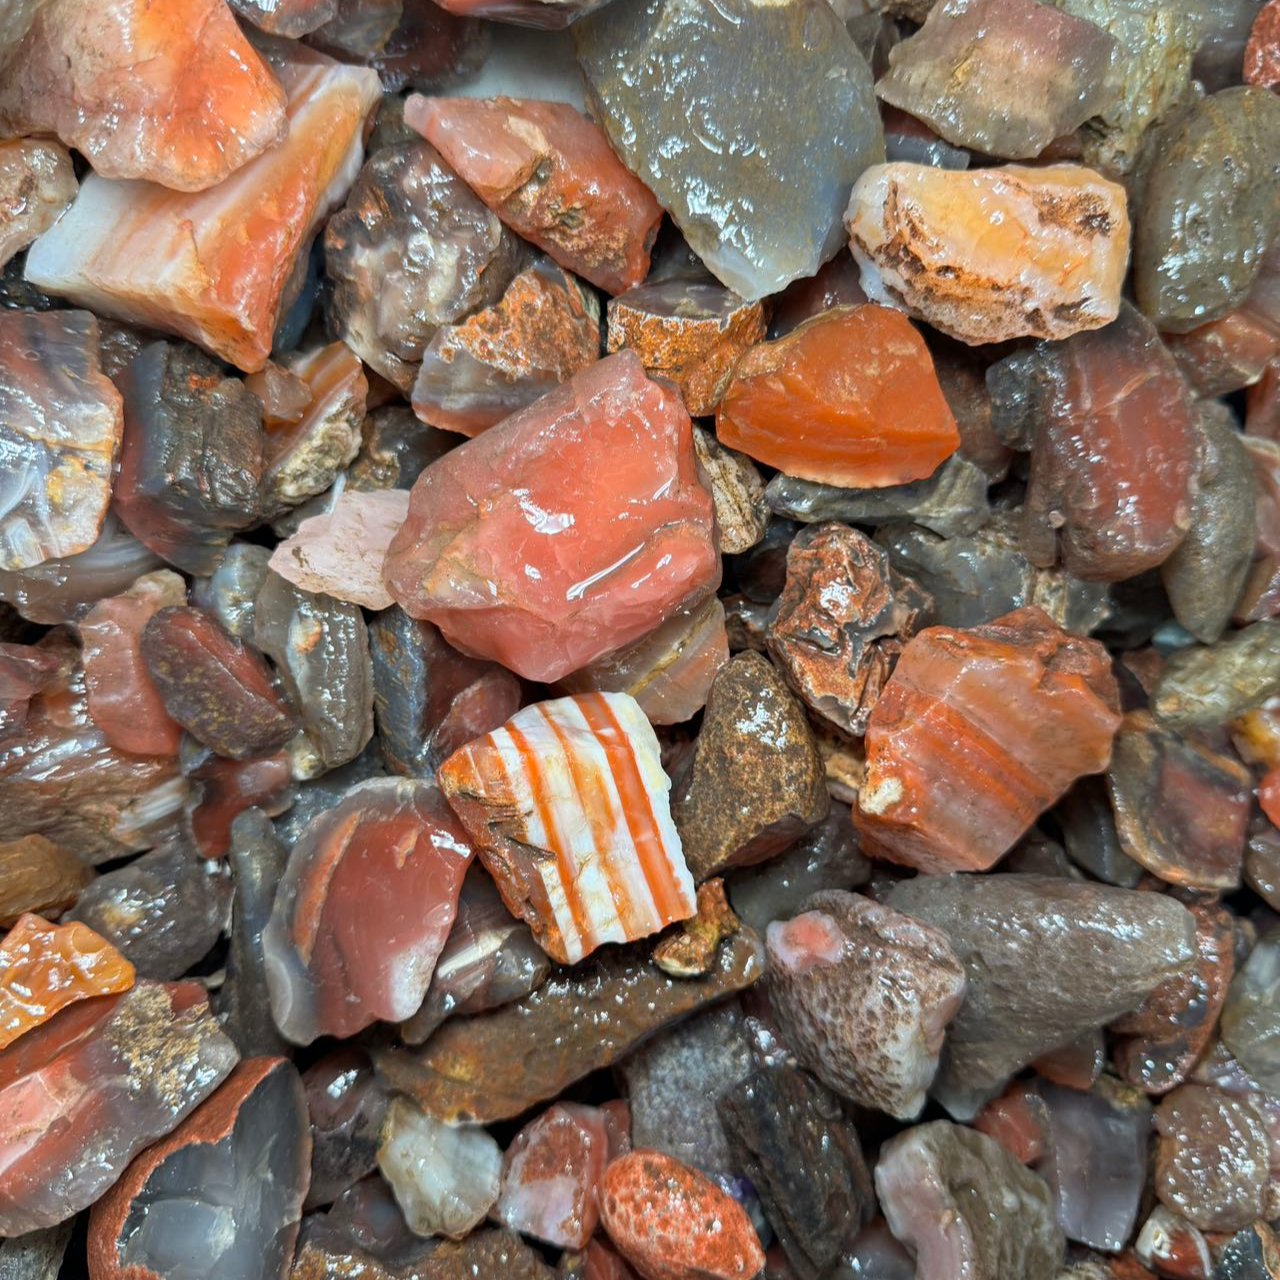
Not all rocks tumble well. The best results come from stones with similar hardness and durability.
- Choose rocks with comparable Mohs hardness ratings to prevent softer stones from wearing away too quickly.
- Avoid rocks with deep cracks, fractures, or crumbly surfaces.
- Common beginner-friendly rough rock include agate, jasper, quartz, and petrified wood.
Washing rocks before tumbling removes dirt that can interfere with grit performance.
Tumbling Grit and Polishing Compounds
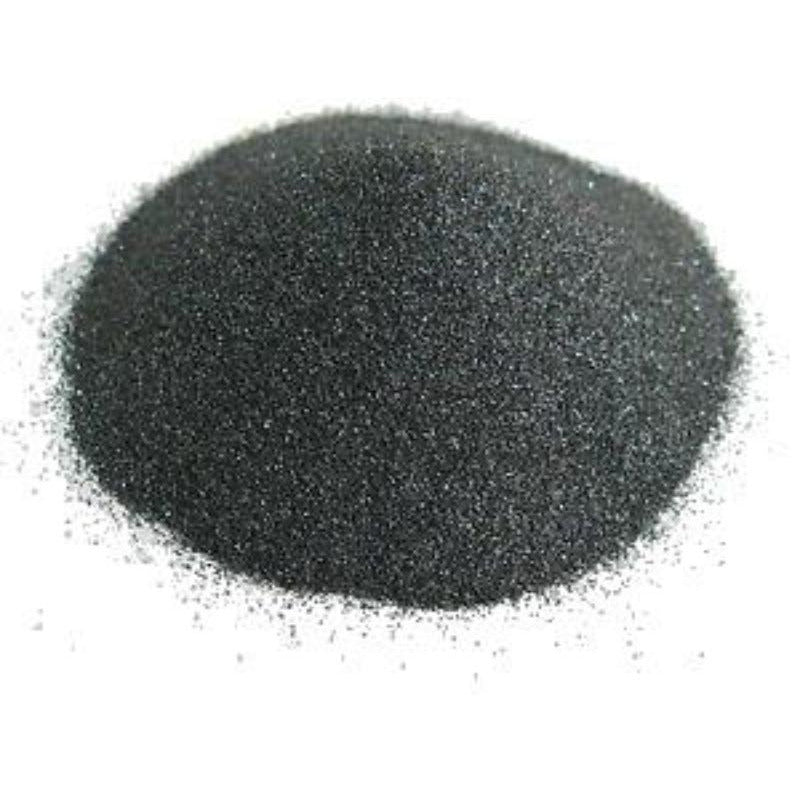
Grit is what actually smooths and polishes your rocks. Each stage uses a different grit size.
- Coarse grit shapes rocks and removes sharp edges.
- Medium grit smooths surfaces and refines shape.
- Fine grit removes small scratches.
- Polishing compound creates the final shine.
Skipping or rushing grit stages often leads to dull or scratched stones.
Water and Other Basic Supplies
Water allows grit to circulate evenly during rock tumbling. Most batches require just enough water to barely cover the rocks.
Optional supplies include:
- Plastic pellets for cushioning softer stones
- Measuring cups for consistent grit amounts
- Gloves and strainers for cleanup
Optional: Rough Grinding Machine

Some hobbyists choose to shorten the most time-consuming stage of rock tumbling by pre-shaping their rocks.
The Model TR-110 Rough Grinding Machine is designed to quickly remove sharp edges and corners from tumble rough before it enters the rock tumbler. This process significantly reduces time spent in the coarse grit stage.
This tool is optional, but it can be especially helpful when tumbling larger batches or rough material with sharp, angular edges.
ALSO READ: Rock Tumbling for Beginners: What You Need to Know
Step-by-Step: How to Tumble Rocks
Below is a clear breakdown of the rock tumbling process from start to finish.
Step 1: Select and Prepare Your Rocks
Start by choosing rocks of similar hardness and size. A mix of small, medium, and slightly larger stones helps promote proper tumbling action.
- Rinse rocks thoroughly to remove dirt and loose debris.
- Break oversized rocks so they fit comfortably in the barrel.
- Discard rocks with deep fractures that may break apart during tumbling.
It’s important to avoid rocks that are too soft or fragile, as they may crumble during tumbling.
Step 2: Load the Tumbler Correctly
Proper loading of your barrel is critical. Incorrect loading can slow the tumbling process or cause damage to your stones or equipment.
- Fill the barrel about 2/3 to 3/4 full with rocks.
- Add coarse grit, typically about 1 tablespoon per lb of rock.
- Add water until it just reaches the bottom of the top layer of rocks.
- Secure the lid tightly to prevent leaks.
This step is crucial in tumbling rocks. The right mix of rocks, grit, and water helps to make sure you get even shaping and polishing.
Step 3: Run the Tumbling Stages
Rock tumbling happens in multiple stages, each building on the previous one.
- Coarse Grit Stage: 5–7 days to round edges and shape stones
- Medium Grit Stage: 5–7 days to smooth surfaces
- Fine Grit Stage: 5–7 days to remove small scratches
- Polishing Stage: 5–7 days for shine
After each stage, rinse rocks and clean the barrel thoroughly before adding new grit to avoid grit contamination. Do not skip stages as it can leave scratches and dull finishes to the rocks.
Patience during these stages is key to learning how to tumble rocks successfully.
Step 4: Polish the Rocks
Polishing is what gives rocks their final shine.
- Add a polishing compound such as cerium oxide or aluminum oxide to a clean barrel.
- Add water as directed
- Allow the tumbler to run uninterrupted for several days, depending on the shine you want.
- For an extra glossy finish, hand polish certain stones after tumbling.
Some stones may benefit from extended polishing time, while others reach a shine more quickly.
Step 5: Finishing and Caring for Your Rocks
Once polished:
- Rinse stones thoroughly.
- Inspect for shine and smoothness.
- Store rocks in a clean container to prevent scratches.
- Clean your tumbler barrel thoroughly to prevent leftover grit from contaminating future batches.
Common Mistakes to Avoid When Tumbling Rocks
Even when you follow the basic steps, small missteps can significantly affect your results. Many issues don’t show up until the later stages, which makes them frustrating to correct. Understanding these common mistakes will help you get smoother, shinier stones with fewer setbacks.
Mixing Rocks of Different Hardness
One of the most common beginner mistakes when learning how to tumble rocks is mixing stones with very different hardness levels together. Softer stones wear down much faster, while harder stones retain sharp edges longer.
Why this matters:
- Softer rocks can erode excessively or turn into grit sludge
- Harder rocks may remain rough or scratch softer stones
- The batch never tumbles evenly
How to avoid it:
Group rocks with similar Mohs hardness ratings together. If you’re unsure, research the material beforehand or run small test batches.
Skipping or Rushing Grit Stages
Each tumbling stage is designed to remove damage from the previous one. Skipping stages or cutting them short prevents scratches from being fully removed.
Why this matters:
- Polishing cannot fix deep scratches
- Rocks may feel smooth but look cloudy or dull
- You may need to restart from an earlier stage
How to avoid it:
Allow each grit stage to run its full recommended time. Inspect rocks carefully before moving on. If scratches remain, repeat the stage.
Poor Cleaning Between Grit Stages
Leftover grit from an earlier stage can contaminate the next stage, especially coarse grit entering fine or polishing stages.
Why this matters:
- Even a small amount of coarse grit can re-scratch stones.
- Results can become uneven.
- You waste precious time spent in polishing.
How to avoid it:
Rinse rocks, barrel, lid, and seals thoroughly after each stage. Many hobbyists dedicate separate barrels for polishing to reduce risk.
Overfilling or Underfilling the Tumbler
The amount of material inside the barrel affects how rocks move and interact.
Overfilling the barrel:
- Reduces tumbling action
- Rocks slide instead of grinding
- Results in poor shaping
Underfilling the barrel:
- Causes too much impact
- Leads to chipping and bruising
- Reduces overall polish quality
How to avoid it:
Fill your barrel to about 2/3 to 3/4 full, including rocks and any cushioning media.
Using Too Much or Too Little Grit
Grit works through controlled abrasion. Using incorrect amounts disrupts that balance.
Too much grit creates a thick slurry that slows down tumbling and increases wear on your equipment while too little grit causes uneven shaping and polishing.
How to avoid it:
Follow manufacturer guidelines for grit amounts and measure consistently for each batch.
Expecting Results Too Quickly
Rock tumbling is a slow process by design. Checking your progress too often or ending stages early usually leads to rocks that look dull or scratched.
Why this happens:
- Beginners underestimate how long smoothing takes.
- Visual progress is slow in early stages.
How to avoid it:
Allow the tumbler to run uninterrupted and trust the process. Good results come from patience and consistency.
Neglecting Equipment Maintenance
Rock tumblers run continuously for days or weeks. Small maintenance issues can quickly become bigger problems.
Common issues include:
- Worn belts causing uneven rotation
- The shaft bushings get sticky if they aren't oiled properly causing rotation to stop
- Leaks from dirty or misaligned lids
- Excess noise from lack of inspection
How to avoid it:
Regularly inspect belts, seals, and barrels. Clean equipment thoroughly after each batch and address wear early.
Frequently Asked Questions
How long does it take to tumble rocks?
Most rock tumbling batches take 4 to 6 weeks from start to finish. This includes multiple grit stages and polishing. Some rocks may require additional time for best results.
What are the best rocks for beginners?
Agate, jasper, quartz, and petrified wood are popular beginner choices. They are durable, tumble well, and polish nicely when handled properly.
Can I tumble different types of rocks together?
It’s best to tumble rocks of similar hardness together. Mixing soft and hard stones often leads to uneven wear and poor polishing results.
Why didn’t my rocks turn shiny?
Common reasons include:
- Skipping grit stages
- Contamination between stages
- Insufficient polishing time
- Rocks not smooth enough before polishing
Polishing only works when scratches have already been fully removed.
Do I need special equipment to tumble rocks?
A basic rotary tumbler, proper grit, water, and suitable rocks are all you need to get started.
How often should I check my tumbler?
It’s fine to check progress between stages, but avoid opening the barrel too frequently during a stage. Excessive checking interrupts the tumbling process and slows results.
Can I reuse grit or polishing compound?
No. Grit breaks down as it’s used and becomes ineffective. Always use fresh grit and polishing compound for each stage.
Is rock tumbling safe?
Rock tumbling is generally safe when equipment is used properly. Always follow manufacturer instructions, avoid overfilling barrels, and keep tumblers on a stable surface and dont block the side vents on the tumbler so it doesn't overheat the motor.
Conclusion
Learning how to tumble rocks is a process built on patience, consistency, and attention to detail. When each stage is given the time it needs and the right materials are used, even beginners can achieve smooth, well-polished stones. As you gain experience, you’ll develop a better sense of which rocks tumble well, how long each stage should run, and how to adjust your approach for different materials.
For more guides, comparisons, and practical insights, visit our lapidary blog, where we regularly share educational resources for beginners and experienced makers alike.